Thursday, January 20, 2011
Frozen Pond. . .
I just wanted to post this picture of the irrigation pond completely frozen. It is just a testament to how cold and harsh this Winter has been.
Shade on 16 Green. . .
We have had a shade problem with 16 green. The shade deprives the turf from the sun, obviously, but it is also impairs drainage. With water not properly draining you can have moss develop. I cannot show you the moss on this green but it is definitely the worse one on the course. The moss is really really bad for turf quality on a bentgrass green. So the Superintendent and I decided the best way to deal with this, was to eliminate some trees. Doing this will benefit the green in two ways,1.)It will get morning sun to the left and back of the green,2.)It will increase air circulation helping to dry the green out more. As I learned in school the most important light of the day, for grass, comes from the MORNING SUN! Here is a picture of the green with the tree line:
Here is a picture of it after we thinned out the treeline:
As you can see we took about 3-4 trees out there, which will definitely help this green be as healthy and as strong as our members expect it to be.
Powerwashing Equipment. . .
The number one question I get from family members, friends, etc. about my job is what do we do during the Winter? Well one thing we make sure to do is to powerwash the equipment. Winter is the perfect time to powerwash the equipment because most of it is not being used. We also want to powerwash the equipment to keep it nice and clean and make sure all the reels and moving parts are free from dirt and sand. Here is a picture of Edgar powerwashing some reels:
We also cut down a lot of dead trees in the Winter. I'll try to post some pictures of that task in the coming days.
Equipment Shed. . .
There was an existing equipment shed/overhang here and it seems that, when they built it, they never put any kind of roofing material on it. The roof was all rotted out and anytime we got even a little rain, it would leak. So we wanted to repair it so we could better preserve the equipment.
Here is when they first started repairing it.
The two previous photos are of the completed roof with the equipment inside.
Friday, December 17, 2010
Changing a Rain Bird Sprinkler head. . .
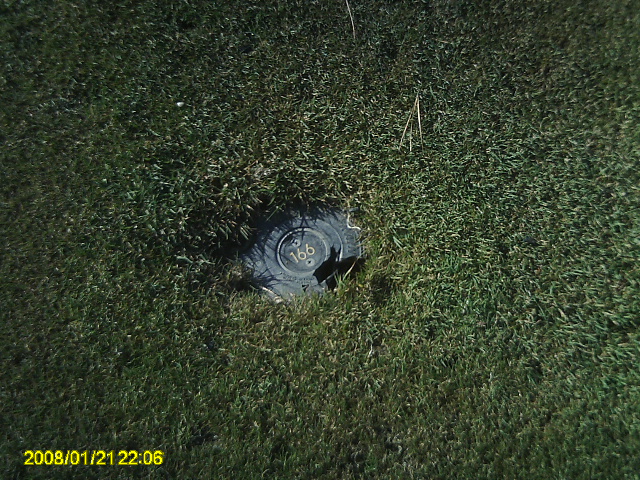
In this post I will describe how to change a Rain Bird 700 series sprinkler head on #17. The 700 indicates that it is a full circle head, meaning it rotates 360 degrees. This particular head was hit by the Verti-Drain:
Now let's remove the head.. .WAIT!! We should first check and make sure that the pressure in the pipe has been removed. Let's check on our quick coupler:
As you can see the case and drive have been cracked. Although the head is not actively leaking, when we go to turn the head on water will shoot out of the side and the drive will not work properly. The first step in replacing a head is turning all the valves off that feed the fairway line. There are four fairway isolation valves on this hole:
Here is the valve located below the ground. We use this valve key which is about four feet long and has a square end on the bottom. After we have closed all the valves we have to discharge the pressure still remaining in the fairway line. We do this by looking for the quick coupler valve that is located in the lowest spot on the fairway. Then we place the quick coupler key in the valve and turn it on all the way, allowing all the water to flow from the pipe:
Depending on how much pipe there is on a particular hole, this process can take up to an hour. So while we are waiting for the water to drain out we can start to dig the head up:
We cut a square out of the turf surrounding the head so it can be easily replaced when we are finished. As you can see the fairway has a hard compacted soil, which the Verti-Drain and Verti-Quake are helping to relieve. We will continue digging until we can freely remove the solenoid:
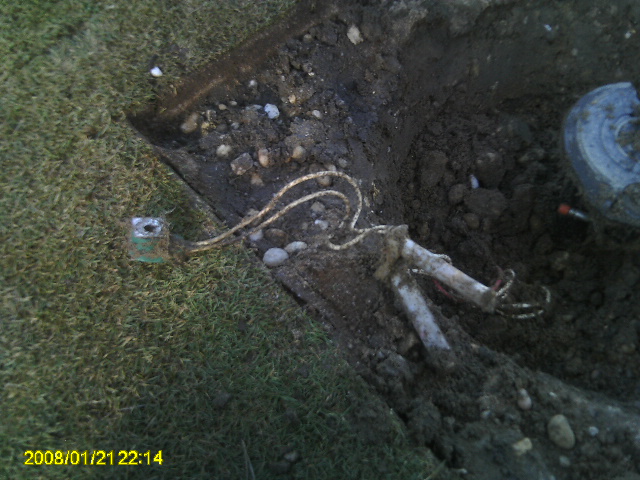
I also remove the solenoid as quickly as possible, just so the wires are out of the way and there is less of a chance of hitting them with the shovel. Now we can continue digging until we reach the bottom of the head and we can visible see the swing joint:
Now let's remove the head.. .WAIT!! We should first check and make sure that the pressure in the pipe has been removed. Let's check on our quick coupler:
Look's like all the water has been removed from the pipe, it is now safe to remove the broken head:
This is what the swing joint should look like after we have taken the head off. There is no more water in the line so therefore, there is no water flowing out of the swing joint. All of the heads we have at Hidden Creek are ACME threaded. This means that we do not need teflon tape or liquid teflon to ensure a water tight seal. The little gasket you see on top of the swing joint makes a water tight seal when the head is tightened all the way BY HAND. You never want to tighten a head with a pipe wrench or channel locks because their is a great chance you will either crack the head or swing joint or both. Now we can put the replacement head on:
The head went on with no problems and we can start to backfill the hole. Don't forget to put the solenoid back on first. The last step after backfilling is to replace the top plate of the 700 drive with the yardage plate from the old drive. Then we can add the square piece of sod around the head and pack it down. This is what the finished head looks like:
Now we can remove the quick coupler and turn all of the valves back on. After that we should check and make sure the head is working and it's not leaking.
Thursday, December 16, 2010
Comfort Stations on #6 and #18. . .
This year the club decided to build two permanent restrooms, or comfort stations as they are called here, on #6 and #18. The comfort stations have a male and female bathroom with a concrete porch that is covered. Here is the picture of the one on #6. . .
As you can see there is some seed coming up(Fine Fescue) and there is also a lot of open space there from construction. We used this John Deer skid steerer with a tree spade on it to plant some trees to fill in that space. Here is the machine:
It's a great machine and is a lot faster and easier to operate than the bigger tree spade. Here is Rufino adding a tree by the comfort station on #6:
The comfort station on #18:
The added trees on the comfort station on 18:
As you can see there is some seed coming up(Fine Fescue) and there is also a lot of open space there from construction. We used this John Deer skid steerer with a tree spade on it to plant some trees to fill in that space. Here is the machine:
The comfort station on #18:
The added trees on the comfort station on 18:
Sunday, December 5, 2010
Cartpath entrance on #2. . .
Here is a shot of the cartpath entrance on the second hole. Most of the cartpath entrance's on the course take a beating based on the amount of cart traffic we get and also based on the fact that the rough is comprised of fine fescue. Fine fescue is an excellent shade grass but it does not like traffic or heat at all. When you put the two together, it doesn't take long to lose areas of the rough. We used the rodadairon to till the area up and then we seeded it with a bluegrass/periennial ryegrass mix. These two grasses are both traffic tolerant. The bluegrass is a lot more drought tolerant than ryegrass.
Here is what it looks like now from the opposite side:
As you can see(through my shadow) it has filled in quite nicely. Through the use of traffic blocks and signs, we will be able to keep it healthy in the Summer.
Subscribe to:
Posts (Atom)


