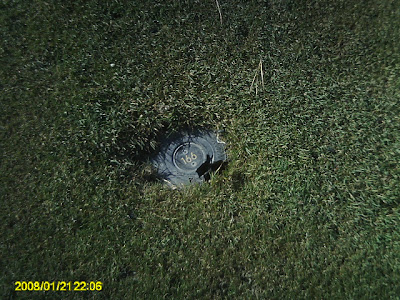
As you can see the case and drive have been cracked. Although the head is not actively leaking, when we go to turn the head on water will shoot out of the side and the drive will not work properly. The first step in replacing a head is turning all the valves off that feed the fairway line. There are four fairway isolation valves on this hole:
Here is the valve located below the ground. We use this valve key which is about four feet long and has a square end on the bottom. After we have closed all the valves we have to discharge the pressure still remaining in the fairway line. We do this by looking for the quick coupler valve that is located in the lowest spot on the fairway. Then we place the quick coupler key in the valve and turn it on all the way, allowing all the water to flow from the pipe:
Depending on how much pipe there is on a particular hole, this process can take up to an hour. So while we are waiting for the water to drain out we can start to dig the head up:
We cut a square out of the turf surrounding the head so it can be easily replaced when we are finished. As you can see the fairway has a hard compacted soil, which the Verti-Drain and Verti-Quake are helping to relieve. We will continue digging until we can freely remove the solenoid:
I also remove the solenoid as quickly as possible, just so the wires are out of the way and there is less of a chance of hitting them with the shovel. Now we can continue digging until we reach the bottom of the head and we can visible see the swing joint:
Now let's remove the head.. .WAIT!! We should first check and make sure that the pressure in the pipe has been removed. Let's check on our quick coupler:
Look's like all the water has been removed from the pipe, it is now safe to remove the broken head:
This is what the swing joint should look like after we have taken the head off. There is no more water in the line so therefore, there is no water flowing out of the swing joint. All of the heads we have at Hidden Creek are ACME threaded. This means that we do not need teflon tape or liquid teflon to ensure a water tight seal. The little gasket you see on top of the swing joint makes a water tight seal when the head is tightened all the way BY HAND. You never want to tighten a head with a pipe wrench or channel locks because their is a great chance you will either crack the head or swing joint or both. Now we can put the replacement head on:
The head went on with no problems and we can start to backfill the hole. Don't forget to put the solenoid back on first. The last step after backfilling is to replace the top plate of the 700 drive with the yardage plate from the old drive. Then we can add the square piece of sod around the head and pack it down. This is what the finished head looks like:
Now we can remove the quick coupler and turn all of the valves back on. After that we should check and make sure the head is working and it's not leaking.


See I learned from the best.
ReplyDeleteVerti Drain
ReplyDeleteThank you for providing such information. This is very generous of you providing such vital information which is very informative.